
The truck has pulled away, and there it sits on your property: a magnificent steel box brimming with potential. The excitement is palpable, but it’s quickly followed by a single, overwhelming question: “Now what?” Congratulations, you’ve taken the first bold step into the world of innovative housing. This comprehensive container home setup guide is your essential roadmap for the journey ahead. We will walk you through every critical phase, from the moment of delivery to the final finishing touches, transforming that shipping container home into your dream home. This is where the real adventure begins.
Phase 1: The First 48 Hours – Inspection, Assessment, and Preparation
Before a single tool is lifted, the initial hours after delivery are critical for setting your project up for success. Rushing this stage can lead to significant headaches and expenses down the line.
Step 1: A Meticulous Delivery Inspection
Your container home has had a long journey. Before you sign off on the delivery, conduct a thorough inspection.
- Check for Damage: Walk around the entire container home. Look for any major dents, deep scratches, or punctures that may have occurred during transport. Pay close attention to the corners, as these are crucial for structural integrity.
- Verify the Condition: If you purchased a “one-trip” container home, it should be in near-perfect condition. If you bought a used container, ensure its condition matches what was advertised. Check for excessive rust, particularly on the roof and underside.
- Operate the Doors: Open and close the cargo doors to ensure they function smoothly. Stiff or misaligned doors can indicate that the container home was twisted or damaged during lifting.
- Interior Check: Step inside and close the doors. Look for any light filtering through. Any pinprick of light is a potential water leak that must be addressed. Note any unusual odors or signs of previous cargo spills.
Step 2: Final Site and Foundation Verification
You’ve planned this for months, but now is the time for a final real-world check.
- Foundation Alignment: Using a measuring tape, double-check the dimensions of your foundation (whether it’s a concrete slab, piers, or a crawl space). Ensure it is perfectly level and that the dimensions align with your container home footprint.
- Clearance for Placement: Confirm that the path for the crane and the placement area is completely clear of obstacles. This includes overhead power lines, tree branches, and any ground debris.
- Utility Stub-Outs: If you have pre-installed plumbing or electrical conduits in your container home, verify their locations against your architectural plans one last time. Make sure they align precisely where the corresponding connections in your container will be.
Phase 2: The Heavy Lift – Placement and Securing Your Home
This is a milestone moment that requires professional execution.
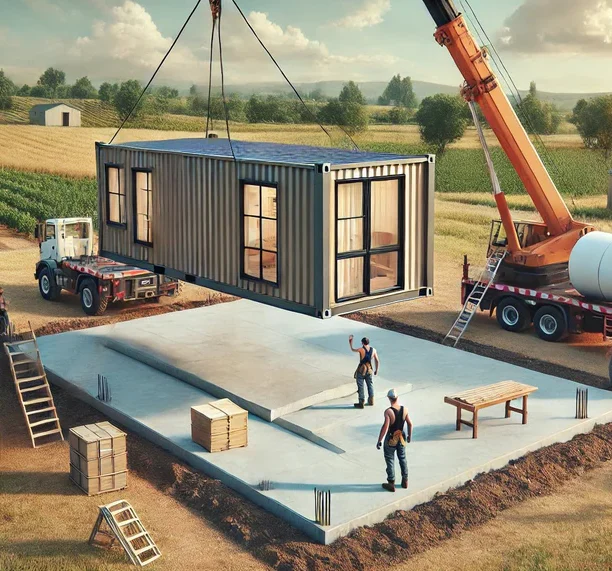
Step 3: Professional Crane Operation and Placement
This is not a DIY task. You must hire a reputable and insured local crane service.
- Communicate Clearly: Provide the crane operator with your detailed plans, showing the exact orientation and placement of the container on the foundation.
- Safety First: Ensure the crane has stable ground to set up on. Keep all personnel at a safe distance during the lift.
- Slow and Steady: The operator will lift the container slowly. Guide them verbally as they lower it into position. It’s a process of small adjustments to get the alignment perfect.
Step 4: Anchoring the Container to the Foundation
Once the container home is perfectly positioned, it must be permanently secured. This prevents any shifting and ensures structural stability. The method for this is typically welding.
- Welding Cast-in Plates: The most common method is to weld the container home’s corner castings directly to steel plates that were embedded in the concrete foundation when it was poured.
- Professional Welder: Hire a certified welder for this job. A strong, clean weld is absolutely essential for the safety and longevity of your container home and is often required by building inspectors.
Phase 3: The Shell Transformation – Cutting, Sealing, and Weatherproofing
With your container home secured, it’s time to start turning the steel box into a recognizable house structure.
Step 5: Cutting Openings for Doors and Windows
This is where you begin to customize your container home.
- Tools for the Job: An angle grinder with numerous high-quality metal-cutting discs is the most common tool. A plasma cutter is faster but more expensive. A reciprocating saw with a metal-cutting blade can also be used.
- Measure Twice, Cut Once: Carefully mark out your window and door openings according to your plans. Use a level and square to ensure your lines are perfect.
- Safety Gear is Non-Negotiable: Always wear safety glasses (or a face shield), hearing protection, gloves, and a respirator to protect against metal dust.
Step 6: Critical Structural Reinforcement
IMPORTANT: A shipping container’s strength comes from its corrugated walls acting in unison with the frame (a monocoque design). Every time you cut a large opening, you weaken the structure. You must reinforce these openings.
- Steel Framing: Weld a frame of steel tubing (box section) around the inside of every window and door opening you cut. This transfers the load from the weakened wall back to the main structure.
- Consult an Engineer: Your architectural plans must include specifications for this reinforcement, signed off by a licensed structural engineer. Do not skip this step; your building department will require it.
Step 7: Comprehensive Rust Treatment and Priming
Corten steel is rust-resistant, not rust-proof. Every cut, grind, and weld exposes raw steel that is vulnerable to the elements, whether it’s the humid Southeast or the snowy Northeast.
- Treat All Exposed Metal: Use a wire brush or flap disc on an angle grinder to clean all cut edges and welds.
- Apply a Rust Converter: Treat these areas with a phosphoric acid-based rust converter. This chemically converts any surface rust into a stable, paintable black primer.
- Prime Everything: Apply at least two coats of a high-quality, direct-to-metal (DTM) industrial-grade primer to the entire exterior of the container. This is your primary defense against the elements.
Phase 4: Life Support – Utility Connections and Local Authorities
This phase requires professional tradespeople and careful navigation of local regulations.
Navigating US Building Codes and Permits
Before any utility work begins, you must have your permits in hand. The process varies by state, county, and even city.
- Local Building Department: This is your primary point of contact. Start by visiting the website for your county or city’s building and planning department. Look for information on permits for new residential construction.
- Zoning Ordinances: Confirm that your property’s zoning allows for residential structures and check for any specific restrictions on size, style, or “alternative dwellings.”
- The International Residential Code (IRC): Most of the US uses the IRC as the basis for building codes. Your container home must be designed to meet or exceed these standards. You can learn more about the codes that form the basis for most US regulations at the International Code Council (ICC) website.
- Utility Companies: Contact your local providers for electricity, water, and gas. They will have specific requirements and processes for establishing a new service connection, which often involves inspections.
Step 8: Electrical Rough-In and Connection
- Hire a Licensed Electrician: This is not a DIY job. A licensed professional will ensure your home is wired safely and to code, and they are required to pull the electrical permit.
- Rough-In: The electrician will run all the wiring (e.g., Romex) through holes drilled in your interior wall studs. They will place outlet boxes and switch boxes according to your plan.
- Main Panel: A breaker box (main panel) will be installed.
- Inspections: The rough-in work must be inspected and approved by the local building inspector before you can cover the walls with insulation and drywall.
- External Connection: After a final inspection, the electrician will coordinate with the power company to connect your home to the grid and install your meter.
Step 9: Plumbing for Fresh Water and Waste
- Hire a Licensed Plumber: Another job for a certified professional who can pull the necessary permits.
- Water Lines: The plumber will run PEX or copper pipes for your hot and cold water supply to the kitchen, bathroom(s), and any other fixtures.
- Drainage and Venting: They will install the larger diameter PVC or ABS pipes for all drains (sinks, shower, toilet) and a crucial vent system that runs up through the roof to ensure proper drainage.
- Inspections: Like electrical, the plumbing rough-in requires an inspection before the walls are closed up.
- Sewer/Septic Connection: The plumber will connect your home’s main drain line to the municipal sewer system or to your private septic tank, as approved by the local health and building departments.
Phase 5: Creating a Comfortable Interior – Insulation and Framing
This is arguably the most important phase for ensuring your home is livable in the diverse climates across the USA.
The Critical Role of Insulation in US Climates
An uninsulated steel box will be an oven in the Arizona sun and a freezer in a Minnesota winter. Proper insulation is not a luxury; it is an absolute necessity. It controls temperature, prevents condensation (which leads to rust and mold), and reduces noise.
Step 10: Choosing and Installing Your Insulation
- Closed-Cell Spray Foam (Recommended): This is the best, albeit most expensive, option. A professional company sprays a layer of foam directly onto the interior walls. It expands to fill every gap, creating a perfect air, moisture, and vapor barrier. This completely prevents condensation from forming on the inside of the steel walls.
- Rigid Foam Panels (Good Alternative): Sheets of XPS (extruded polystyrene) or Polyiso (polyisocyanurate) foam board can be cut to fit between your wall studs. It’s crucial to seal every seam with high-quality construction tape and use spray foam in a can to fill any gaps to create a continuous vapor barrier.
- Do Not Use Fiberglass Batts: Traditional fiberglass insulation is not recommended as it can absorb moisture if any condensation occurs, leading to mold, rust, and reduced effectiveness.
Step 11: Interior Wall Framing and Subflooring
- Framing: Build your interior walls using either light-gauge steel studs or traditional wood studs. This frame sits just inside the container walls, creating a cavity for your insulation and utilities.
- Subfloor: The original marine-grade plywood floor of a container is treated with harsh pesticides. It’s highly recommended to either seal it completely with multiple coats of a non-toxic floor sealant or remove it entirely. You will then lay a moisture barrier and a new subfloor (e.g., AdvanTech or standard plywood) on top of the floor joists.
Phase 6: The Final Stretch – Bringing Your Vision to Life
This is where your house becomes a home.
Step 12: Drywall, Paint, and Wall Coverings
- With framing, insulation, and utilities having passed rough-in inspections, you can now hang drywall.
- The drywall is then taped, mudded, sanded, and primed.
- Finally, you can paint the walls in your chosen colors or apply other finishes like shiplap, wood paneling, or wallpaper.
Step 13: Flooring Installation
- Install your chosen flooring over the subfloor. Options include luxury vinyl plank (LVP), laminate, tile, or engineered hardwood.
Step 14: Kitchen and Bathroom Fit-Out
- Cabinetry and Countertops: Install your kitchen cabinets and countertops.
- Fixtures: Install the kitchen sink, faucet, toilet, bathroom vanity, and shower. Your plumber and electrician will return for these final connections.
Step 15: Final Inspections and Occupancy
- Install light fixtures, switches, and outlets.
- Install interior doors, baseboards, and trim.
- Once everything is complete, you will schedule a final inspection with your local building department. Upon passing, you will be issued a Certificate of Occupancy (CO), and you can legally move in!
Frequently Asked Questions (FAQs)
Do I really need a permit for a container home in the USA?
Yes, absolutely. Any permanent residential structure requires a building permit. You must work with your local city or county building department. Attempting to build without a permit can result in massive fines, demolition orders, and the inability to get insurance or utilities.
What is the biggest mistake to avoid?
The biggest mistake is failing to understand and comply with local building codes from the very beginning. The second biggest mistake is improper insulation, which leads to an uncomfortable and deteriorating home.
How much does it cost to finish a container home in the USA?
The initial container is only a small part of the cost. A very rough estimate for finishing a 20-foot container can range from $25,000 to $75,000+, depending heavily on your location, the quality of finishes, labor costs, and site conditions. A 40-foot container can easily cost $50,000 to $150,000+ to finish.
Can I get a traditional mortgage for a container home?
It can be challenging. Many traditional lenders are hesitant. However, options are improving. Look for lenders who offer construction loans, chattel loans, or personal loans. Working with a builder who has established relationships with lenders can be a significant advantage.
Conclusion: From Steel Box to American Dream
The journey from a bare steel container to a finished home is challenging, rewarding, and requires meticulous planning. By following this container home setup guide, engaging with your local building department early, and hiring the right professionals for critical tasks, you are well on your way to creating a unique, durable, and modern home. You’ve moved beyond the dream and into the build. Welcome home.

